 With the arrival of heat, through the open windows and air vents, "uninvited guests" - flies, midges, wasps, mosquitoes and other insects begin to penetrate the premises. Plus, the wind brings dust, poplar fluff and various debris. Mosquito barriers on the windows and balcony doors help to protect the home from all these "charms".
Even 15 years ago, insects were fought with the help of the most ordinary gauze or tulle, which were fastened to the window with stationery buttons. Such a "decoration" on the windows looks unaesthetic and will last only a few months.
Today, in any hardware store you can buy a special mosquito net is quite inexpensive. People call it a mosquito net or "mosquito".
This net canvas is a glass fiber, covered with a thin layer of PVC. Easily attached to wood, plastic, aluminum and composite surfaces.
The advantages of this material are:
- durability and long service life;
- resistance to temperature fluctuations;
- resistance to sunlight;
- high degree of protection against dust and insects;
- the ability to freely pass light and air;
- environmental friendliness and lack of unpleasant smell;
- acceptable cost.
Cloth mesh, most often, has a width of 1.5 - 1.6 m. This figure varies - each manufacturer has its own standards. The cells have different sizes. For windows, a cloth with cells from 0.1 cm to 0.3 cm is most often used.
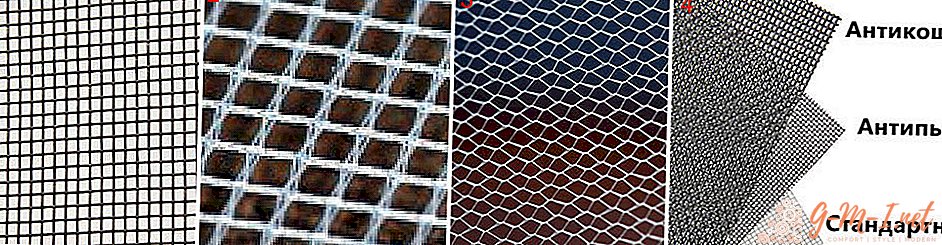
Manufacturers produce several types of net canvas, depending on itsdestination:
- "standard";
- "outdoor";
- "elite":
- "anti-dust" and "anti-dust";
- "antimyoshka";
- "antikoshka";
- "maximum review".

Most modern windows are metal-plastic. They are equipped with anti-mosquito barriers. Their design is designed in such a way that it does not hinder the functioning of windows at all, is easy to install, remove and is inexpensive.
By installation site mosquito nets are divided into two groups:
- window;
- door.
By fastening method:
- outdoor;
- internal.
Bytypes of construction:
- framework (most popular);
- swing (like wickets);
- sliding;
- roll (roll);
- pleated (in the form of "accordion").
We determine the design and material of manufacture
If the mosquito net has broken down during operation or has flown away, torn by a gust of wind, and if it was decided to save on it when installing windows, the mosquito net can be easily made independently, and it will be quite inexpensive.
In order to decide exactly what you need, you should consider a number of factors:
- type of building - a private house or apartment;
- what floor is the dwelling;
- type of window material - metal or plastic;
- opening method - swiveling or folding;
- presence of pets;
- availability of construction experience.

Based on the above points, the type of construction, type of material and method of mounting the mosquito bar are chosen.
It is clear that if the apartment is on a high floor, then the method of internal fastening will do. In the one-story house you can install the grid outside.
If you live in tundra conditions, where there is a lot of midges or in a steppe area, where there is a lot of dust, you should choose a grid with a smaller cell size. If the house has a cat, then the canvas is better to choose the "anti-window".
You should decide on the color of the grid. Light canvas - lubricates the picture outside the window, making it fuzzy and non-contrast. Gray, brown and black will make it clearer and less blurry, but it will see dust and dirt, and green will be pleasant to the eye.
Attention! In pursuit of cheapness you should not choose a grid of dubious quality or cheap Chinese, it is better to purchase a canvas from well-known manufacturers. Low-quality material begins to crack and crumble after the first season of operation.
If it is decided to use a frame construction, it is necessary to decide on the method of fastening the mesh to the frame. The most common and reliable is the Z-shaped profile. Often use plungers and brackets.
We make measurements for the manufacture of the grid on the window
“Measure seven times and cut once” - this proverb is very relevant in this case. The accuracy of the measurements will depend not only on the appearance of the window, but also on whether the mosquito bar can perform its task qualitatively and whether it will not interfere with the opening and closing of the window.
Measurements are made using tape measure or centimeter tape. When the window is open, measure the width and height of the window opening at the inner edges of the frame, from one sealing gum to another.
Mosquito net laid out on a flat surface. Marker or pencil markup and make a pattern.
Attention! When you cut the mesh, you can orient yourself to the cells, in which case the cut line will be smooth.
Light enough in execution - frame structures. This is the main reason for their widespread use.
Option number 1 - from the cable channel
This option is the most simple and easy, compared to others. Frame dimensions - the length and width we have already measured and the mesh is cut.
What you need:
- cable channel - 1.5 x 1.0 cm (its length is selected in accordance with the perimeter of the window opening);
- plastic profile with U-shaped section;
- flat metal corners - 4 pcs .;
- aluminum rivets (diameter - 7-10 mm);
- zaklepochnik;
- drill with 4 mm drill;
- hacksaw;
- miter box


General assembly algorithm:
- Lay out the cable channel along the length and width of the window opening.
- Saw off pieces of cable profile at an angle of 45 degrees, remove the cover from them. For this stage of work it is very convenient to use a "block", which will allow to cut the profile at an angle of 45 degrees.
- Lay the future construction on a flat surface with a rectangle.
- Place the metal corners in the corners and mark the places of the holes.
- Drill the holes and connect the structure with rivets.
- Place the grid on the finished frame, making sure that there are no folds and close the lids.
- Saw with a hacksaw two pieces of U-shaped profile length = width of the frame.
- Fix the pieces of the U-shaped profile on the window above and below, so that they easily enter the structure.
Option number 2 - from the purchase set
This option is more difficult to manufacture than the first and more expensive.
In the hardware store you need to purchase a ready-made kit for making a frame and a grid. Prepare the necessary tools and assemble the frame according to the instructions.
Features of the manufacture of frameless design
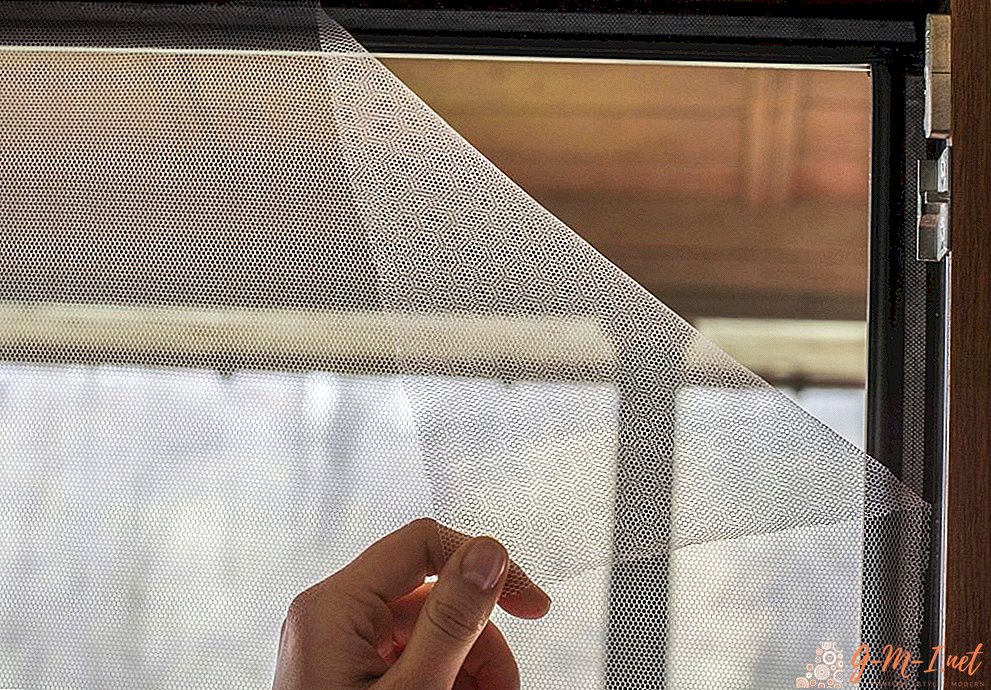
The cheapest way is to install a mosquito net right on the frame. The easiest to make yourself is frameless or frameless mosquito net.
For the manufacture of frameless design it is necessary to make a gap on the net canvas 20-30 mm. We recall that the measurements were made and the "mosquito" is already cut out.
Option number 1 - in place of the sealing cord
What you need:
- rubber or any other cord, or a clothesline with a diameter of 0.4 cm;
- scissors;
- tool for "pushing" the cord into the groove - the handle of a screwdriver or knife.

Algorithm manufacturing:
- Carefully remove the sealing cord from the groove.
- If the window is no longer new, then surely dust and dirt has accumulated in the groove. Use a damp cloth to rinse it.
- Starting from the top corner, along the perimeter, the cord is pressed into the groove along with the mesh. At the same time it is necessary to observe the uniformity and quality of the web stretch.
Attention! The sealing gum is cleaned, dried and stored for storage. In the autumn, the cord with the net is removed from the window frame and the sealing cord is put in place.. The netting and cord are washed and cleaned until spring.
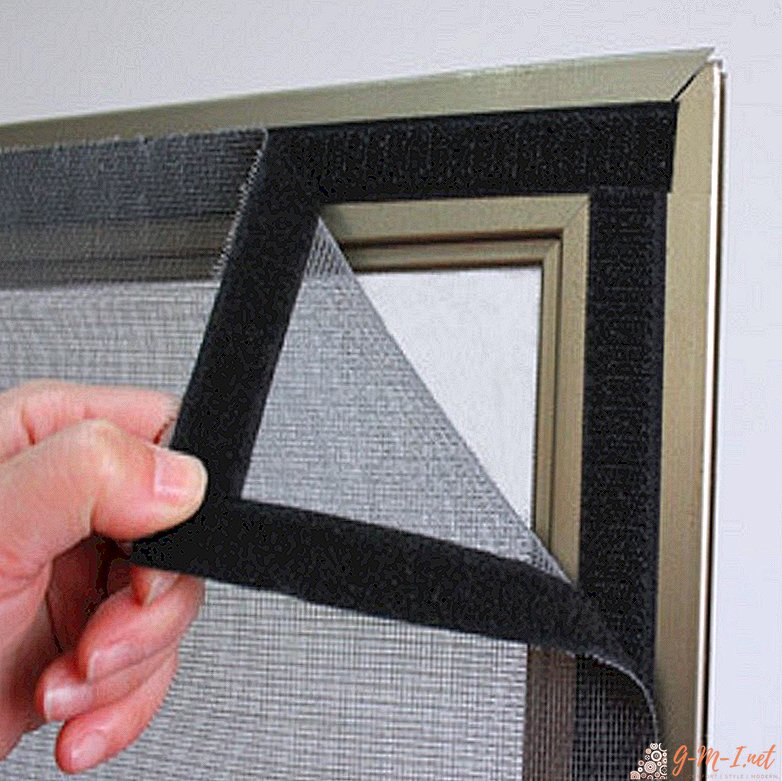
Option number 2 - Velcro
What else is needed besides the grid:
- tape measure or centimeter;
- a contact tape - a flypaper, its length = perimeter of a window opening;
- glue or liquid nails;
- thread, needle;
- scissors.
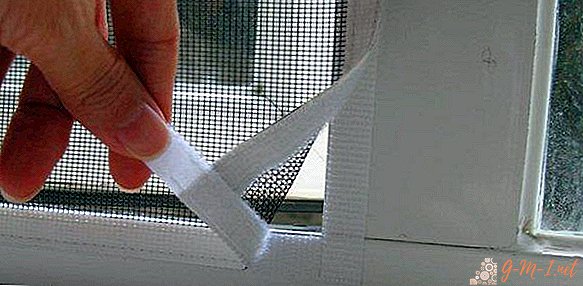

Algorithm manufacturing:
- According to the removed dimensions, cut the contact tape into 4 parts.
- Thoroughly rinse the frame and degrease it with a solvent or alcohol.
- Glue the sticky (barbed) part of the tape onto the greased frame.
- The other part is to sew around the perimeter to the net cloth manually or with the help of a sewing machine.
- Connect both parts of the contact tape, while the grid is firmly fixed to the frame.
Attention! Sewing velcro to the grid, it is worth leaving a piece of 3-5 cm, for this "tongue" can be pulled to separate the grid from the frame.
Self-made mosquito nets are unpretentious in care. It is enough to wipe their surface with a wet sponge with detergent dissolved in warm water.
Attention! Particles of dust, debris and down from the net cloth are washed with a cold hairdryer or vacuum cleaned before washing. The frame structure is easy to clean with running water from the shower.
The do-it-yourself mosquito will protect the house from unwanted guests, debris, dust, protect pets and birds from falling out of windows, as well as from falling down various objects, such as flowerpots.
As you can see, making a mosquito net is very easy and fast. To do this, it is not necessary to be a carpenter of the 3rd category. It will cost much cheaper than the "finished"!
Leave Your Comment