 A dollhouse is the dream of every girl. All dolls certainly need to have a locker for storing clothes, a private living room, a bathroom, and, of course, a bedroom. The most important thing in the bedroom is the bed, because no girl will allow her doll girlfriend to sleep on anything. You can buy a bed, but making it with your own hands is much more pleasant.
 Making a crib for a doll yourself is a whole adventure, and even more so if an adult comes to the rescue. Joint creativity will benefit both the parent and the child, helping her daughter make a crib for the doll, you thereby show that her interests are very important to you. Of course, you can buy a crib for any of the dolls, but a homemade one will be better for several reasons:
- You will make the model that the child wants;
- You will choose the material for the product yourself, which means that the final product will be of high quality, which can not be said about plastic;
- the decor of the product will be special;
- You will spend more time with your child.
IMPORTANT! Always listen to the wishes of your daughter, even if you know how to do it better, make a bed as your child asks, because you make a toy for her.
Cribs for dolls can be wooden, cardboard, bunk and collapsible. Today we will consider the manufacturing options for each of them.
Wooden doll bed
 Perhaps one of the strongest materials for making a doll crib can be considered a tree. It is very easy to be disappointed by buying such a bed in the store, as manufacturers do not really care about security, and it is unlikely that they will be sanded and processed during the production of such a toy. Moreover, if it is covered with paints of unknown origin, it will become toxic and unsafe. That is why it is better to make a cradle on your own, so you will protect the child from splinters in his hands, which may well appear after contact with a factory toy. The material can be absolutely any pieces of wood: bars, boards, plywood sheets.
To make a crib from a tree, you will need such tools:
- screws and screwdrivers;
- Ruler and pencil;
- drill, jigsaw, wooden blocks and planks.
Before cutting parts from wood, you should create a model of the product on paper, then transfer it to the selected material and saw it. If the bed model has rounded shapes, you need to cut them out using a jigsaw. Make holes for future mounting. Check if all the parts fit together well, if everything is fine, sand them with sandpaper and fasten together. As fasteners, self-tapping screws can be used.
IMPORTANT! The tree for the doll's crib should be of medium humidity, not dry, otherwise the finished product will fall apart.
The finished product can be varnished, but can be left in its natural form, all the same, a toy made of natural wood will look very solid.
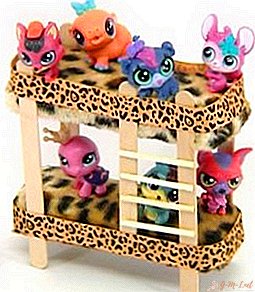
Bunk bed
 If your daughter has not one favorite doll, but two or more, you can immediately make a bunk bed so that she puts all her friends to bed together. Material for such a crib can serve as cardboard, and plywood, and wood. It all depends on the imagination and ability to use tools. Consider product options from various materials.
Matchbox bunk bed
For small toys, you can make a double-decker bed from matchboxes, it will look cute and stylish. You need 4 matchboxes, ice cream sticks, matches, cotton pads, a piece of cloth, a glue gun and braid.
- Boxes of 2 pieces are glued together with a train for the lower and upper tiers.
- Glue cotton pads on top to make the bed softer, cut off the excess parts on the sides.
- We tighten the resulting 2 tiers with a cloth, fix it with hot glue.
- We make the supporting posts from sticks for ice cream, and also glue them with a glue gun.
- We make a ladder. Glue another stick of ice cream at a small distance parallel to the support column. We use matches as steps.
- We tape the first and second tiers of the bed.

Cardboard or plywood bunk bed
For larger dolls, you can make a design from plywood. Consider manufacturing in stages.
- We draw 2 rectangles on a plywood sheet, its length and width will depend on the growth of the pupae. These details will serve as the basis for the mattress.

- Next, draw 2 rectangles with rounded edges. Their height should equal the height of the design. They will support the bed.
- We prepare 2 strips of plywood for the side sides of the crib.
- We cut out the details and assemble the bed with a glue gun.

IMPORTANT! Before cutting parts from plywood, it is best to make a pattern on paper. So you can estimate the size, and make sure you measured everything correctly.
Crib for a doll from a shoe box
If there is no plywood or wood at hand, and the child does not want to wait for the crib for dolls, you can easily make it from a shoe box. This material is strong enough, and the manufacturing process itself does not take much time:
- cut the box lid in half;
- one half of the lid must be very tightly attached to the end of the box;

- note with a pencil the desired height of the legs, set aside the box itself, draw the shape of the bed legs, do not make them too tall, the product may become unstable, the distance between the legs should be equal to ¼ of the entire length of the side of the cover - then the finished structure will not fall on its side;
- We do the same actions with the second half of the cover - then you can expand the parts, or cut off the excess - as a result, the following sides should be obtained:

- you can shape the crib with a paper cutter - draw with a pencil what you need to cut, glue the cut edge, if the box is stratified, you should get a box similar in shape as in the photo below;

- And the final stage of work will be the fastening of the legs to the base of the bed.

The crib from the shoe box is ready - you can decorate the product in any way you like.
Paper or cardboard doll crib
A doll’s bed can also be made of cardboard, for these purposes kraft cardboard is suitable, it holds its shape well and is quite dense. As in the previous cases, the patterns made on paper should be transferred to cardboard:

- The dimensions of the parts must match the size of the doll.
- Each detail is cut in duplicate on beautiful paper, you can color.
- We also cut out the same parts from cardboard and glue the same paper blanks on both sides. To make the design more stable, it is better to put wire between paper and cardboard.
IMPORTANT! The smaller the bed in size, the more stable the entire structure will be.
Collapsible bed for a doll
In order not to bother with glue and other tools, you can make a model that will disassemble. And when the child gets tired of this bed, it can be easily replaced. Nothing is easier:
- Draw a rectangle on the cardboard, the sizes can be taken as you need. For example: 14 × 35, 7 × 16 - 2 pcs., 8 × 14, 6 × 14.
- Next, you need to make incisions, and assemble the product.
The finished bed should look like this.

The dimensions of the entire structure can be anything; such a product is made as soon as possible.
Decorating and decorating a doll's bed is a fascinating process that will bring a lot of pleasure to the child. Here the fantasy is unlimited, and you can use anything you like: beads, ribbons, beautiful braid and beads.
It is enough to simply varnish a wooden bed, or paint in any color you like. You can use paint from a spray can, the layer will lie evenly and beautifully.
The plywood product can be glued with paper, cloth, decoupage. To make all toys comfortable to relax, you need to sew bedding, pillows and bedspreads. Use natural fabrics, they always look advantageous, and even small details are convenient to sew from them.
What could be more interesting than creating with your child! Spend time together for an exciting pastime, craft from improvised material, and you will save money on doll furniture, but it will gain much more!
Leave Your Comment